Tensorflow 2.3 Installation on Windows 10 ( GPU )(EN)
Tensorflow 2.3 Installation on Windows 10 ( GPU )
-
When I tried to install Tensorflow 2.x with Anaconda, something didn’t work well.
-
When Keras is installed in Anaconda, Tensorflow 1.x and CUDA / cuDNN, which are required for GPU Support, are automatically installed and used conveniently, but it was a lot of disappointment.
-
It seems that version matching for compatibility between packages has not been done yet.
-
So, in this post, I am going to manually setup Tensorflow 2.x & GPU support environment in the Anaconda environment on Windows 10.
-
The content of this post was created by referring to the video below.
Anaconda/window10 - Tensorflow 2.0 GPU 시원하게 설치해보자! (visual studio 2017/cuda10.0/cudnn)
0. Package Version Check
-
First, you need to check the Tensorflow and Python version and other package versions you want to use.
-
You can check it on the Tensorflow Site below. Please refer to the link below.
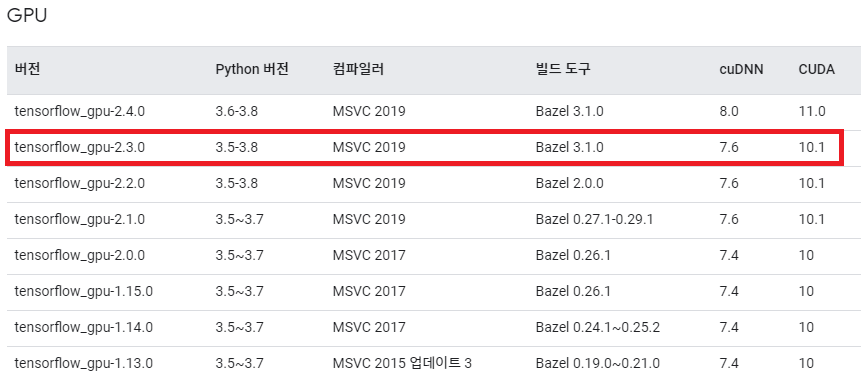
- I am going to use Tensorflow 2.3, so check the Python, Build Tool, cuDNN, and CUDA Version accordingly.
1. Anaconda Install
-
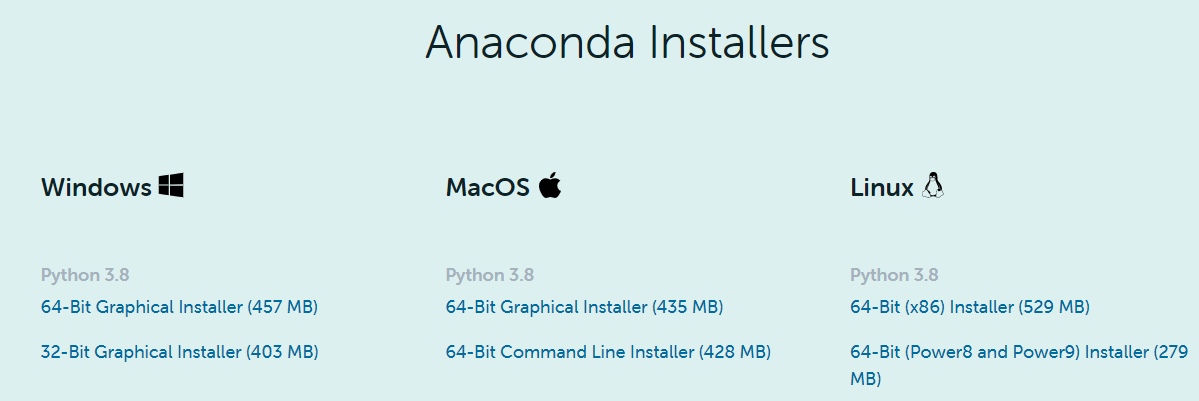
First, let’s install Anaconda. Download from the link below.
-
Let’s check the OS Version and Python version you want to install.
-
Download & install.
2. CUDA Toolkit & cuDNN Download
-
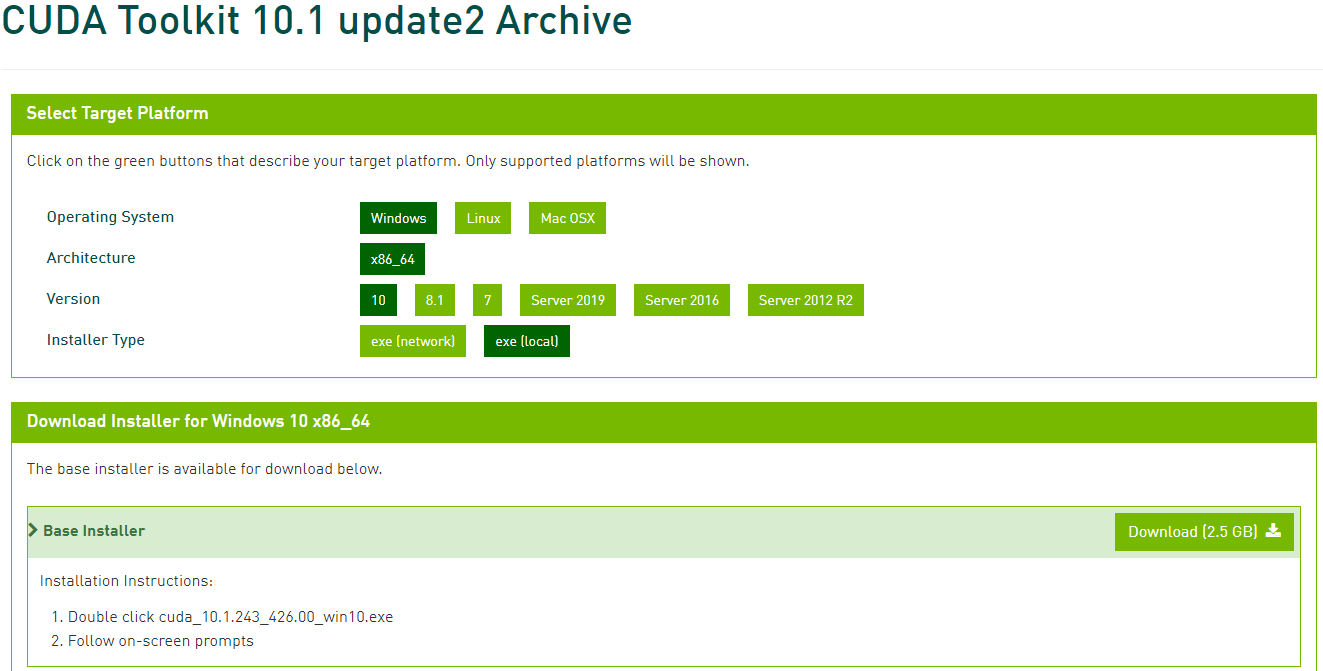
Next, download CUDA Toolkit & cnDNN.
- cuDNN needs an account, so I’d like to recommend you to make one.
- cuDNN

3. Anaconda Update
- The packages installed by default in Anaconda needs to be updated to the latest.
conda update conda
conda update anaconda
conda update python
conda update –all
-
Now, create a virtual environment. Name it whatever you want.
(I will name it ‘TF.2.3.0-GPU’.)
conda create –name TF.2.3.0-GPU
4. Visual Studio Build Tool & Redistributable Download & Install
-
At this step, I will install Visual Studio Build Tool & Redistributable.
-
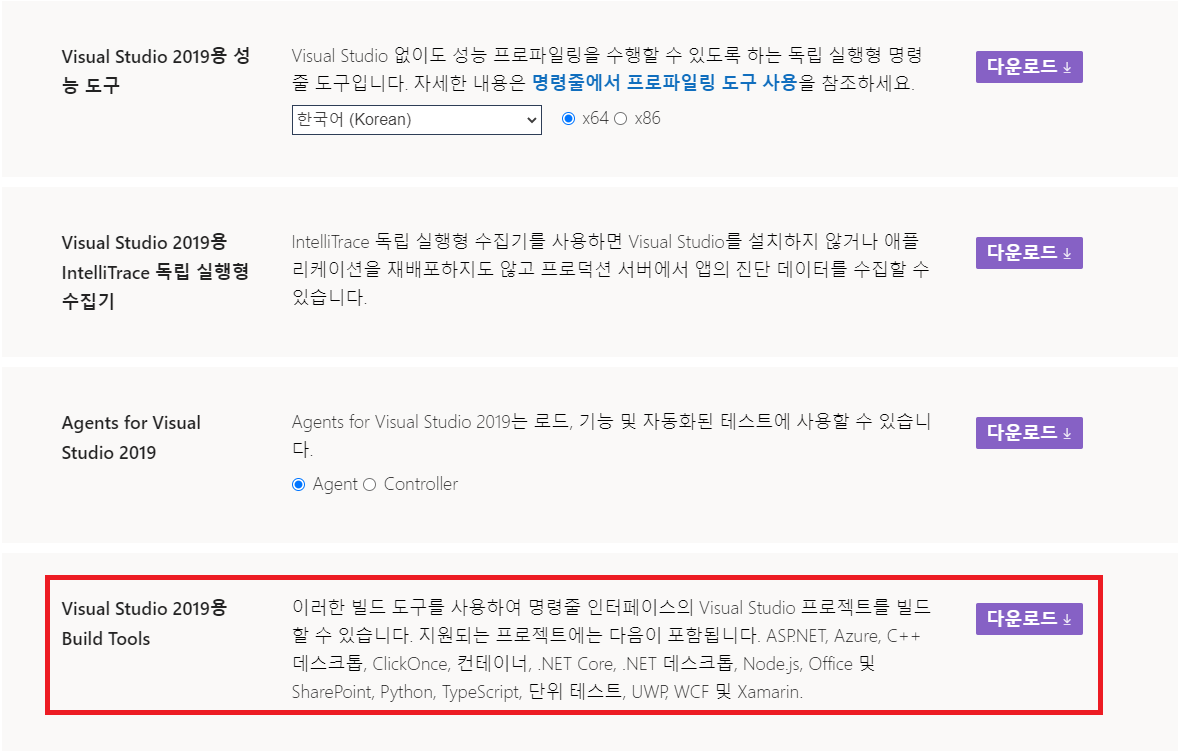
TF 2.3 requires Build Tools for Visual Studio 2019 & Microsoft Visual C++ Redistributable for Visual Studio 2019.
-
You can download it by below link.
Visual Studio 2019 Build Tools
Visual Studio 2019용 Microsoft Visual C++ Redistributable
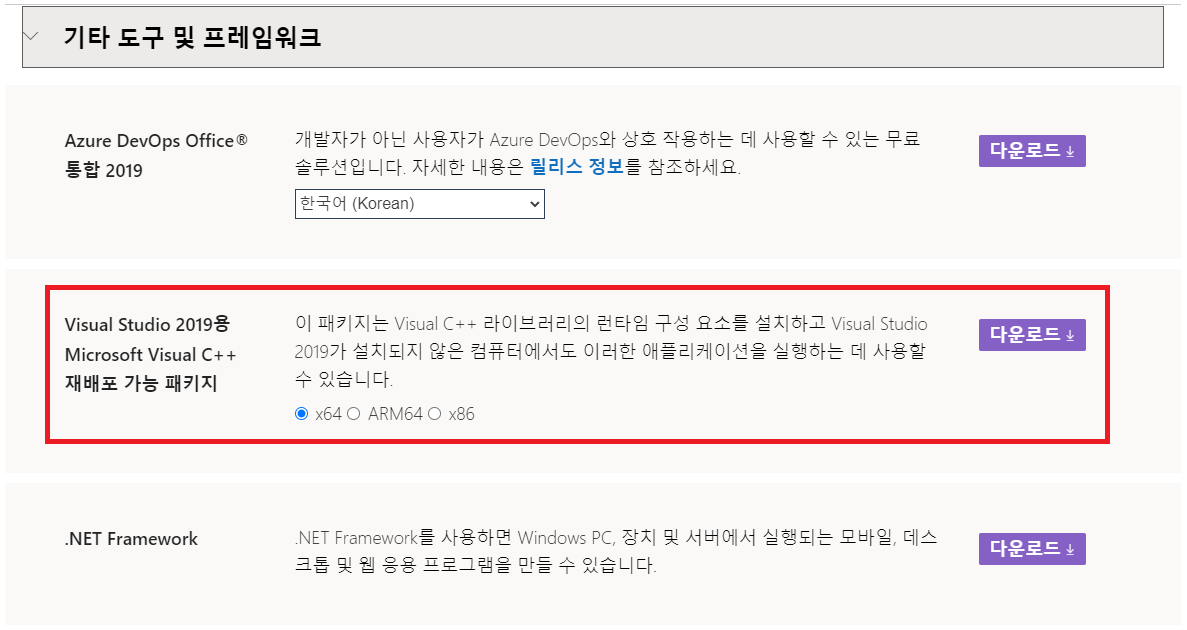
- Install the downloaded Visual Studio Build Tool & Redistributable in order.
5. CUDA & cuDNN Install
-
Install CUDA Toolkit downloaded before.
-
You just have to go straight as directed.
-
There is no special way to install cuDNN, but after extracting it, you can copy the files in three folders to the same folder name in the location where CUDA Toolkit is installed.
6. Tensorflow Install
-
Almost done.
-
Activate the TF 2.3 virtual environment created.
conda activate TF.2.3.0-GPU
- Install ipython kernel.
conda install ipykernel jupyter
python -m ipykernel install –user –name TF.2.3.0-GPU –display-name “TF.2.3.0-GPU”
-
Now you only need to install Tensorflow. At this porint, if Tensorflow and Python version do not match, Tensorflow will not be installed.
-
In this case, you need to match Python version to Tensorflow.
conda install python=x.x.x
- Install Tensorflow.
pip install tensorflow==2.3
- It takes a while and when it is finished, reboot.
7. Verification
- Run below code.
import tensorflow as tf

tf.__version__
'2.3.0'
from tensorflow.python.client import device_lib

print(device_lib.list_local_devices())
[name: "/device:CPU:0"
device_type: "CPU"
memory_limit: 268435456
locality {
}
incarnation: 1980815847893330967
, name: "/device:XLA_CPU:0"
device_type: "XLA_CPU"
memory_limit: 17179869184
locality {
}
incarnation: 3022208443520489181
physical_device_desc: "device: XLA_CPU device"
, name: "/device:GPU:0"
device_type: "GPU"
memory_limit: 5060693856
locality {
  bus_id: 1
  links {
  }
}
incarnation: 17026303584874205879
physical_device_desc: "device: 0, name: GeForce GTX 1060 6GB, pci bus id: 0000:01:00.0, compute capability: 6.1"
, name: "/device:XLA_GPU:0"
device_type: "XLA_GPU"
memory_limit: 17179869184
locality {
}
incarnation: 11299119644739967365
physical_device_desc: "device: XLA_GPU device"
]
tf.test.is_gpu_available(
    cuda_only=False,
    min_cuda_compute_capability=None
)
True
tf.config.list_physical_devices('GPU')
[PhysicalDevice(name='/physical_device:GPU:0', device_type='GPU')]
- It seems to work well.
Appendix
- In Tensorflow 2.3, scipy 1.4.1 worked well.