Tensorflow 2.3 Installation on Windows 10 ( GPU )
Tensorflow 2.3 Installation on Windows 10 ( GPU )
-
Tensorflow 2.x을 Anaconda에서 설치하려고 하니 뭔가 잘 되지 않았습니다.
-
Anaconda에서 Keras를 설치하면 Tensorflow 1.x와 GPU Support에 필요한 CUDA / cuDNN 등을 자동으로 설치해서 편리하게 사용했는데 많이 아쉽더군요.
-
아마 Package간 호환을 위한 Version Matching이 아직 잘 되지 않은 것 같습니다.
-
그래서, 이번에 Windows 10에서 Anaconda환경에서 Tensorflow 2.x & GPU Support 환경을 손수, Manual하게 꾸며볼까 합니다.
-
이번 Post 내용은 아래의 영상을 참고하여 작성되었습니다.
Anaconda/window10 - Tensorflow 2.0 GPU 시원하게 설치해보자! (visual studio 2017/cuda10.0/cudnn)
0. Package Version 확인
-
우선 자신이 사용하려는 Tensorflow와 Python Version 및 기타 Package Version을 확인해야 합니다.
-
아래 Tensorflow Site에서 확인 가능합니다. 아래 Link를 참고하세요.
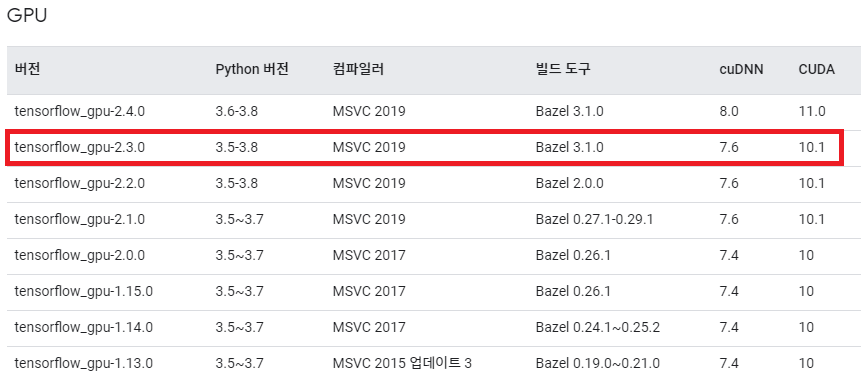
- 저는 Tensorflow 2.3을 사용할 예정이기 때문에 그에 맞는 Python , Build Tool , cuDNN , CUDA Version을 확인합니다.
1. Anaconda 설치
-
먼저 Anaconda를 설치하도록 합니다. 아래 Link에서 Download합니다.
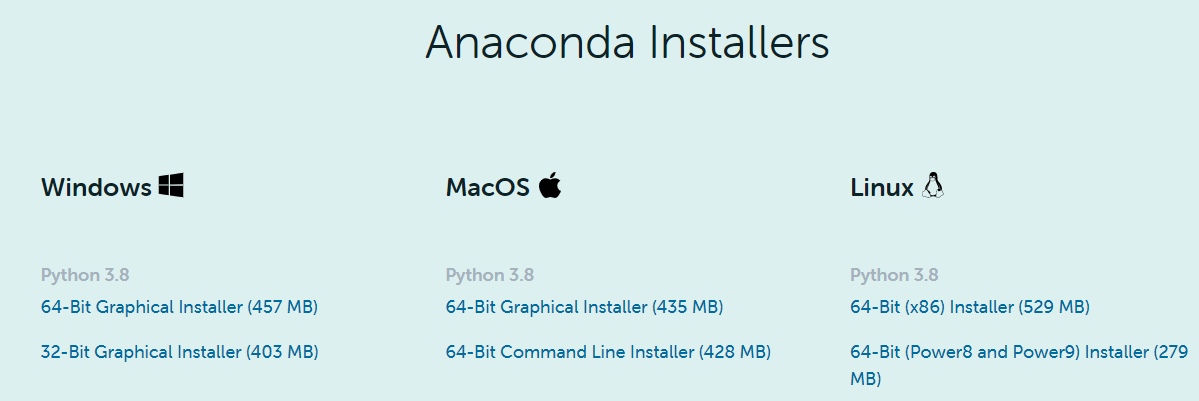
-
설치하려는 OS Version과 Python Version을 잘 확인합니다.
-
Download & 설치 진행합니다.
2. CUDA Toolkit & cuDNN Download
-
이어서 CUDA Toolkit & cnDNN을 Download합니다.
- cuDNN은 계정이 필요하니 하나 만듭니다.
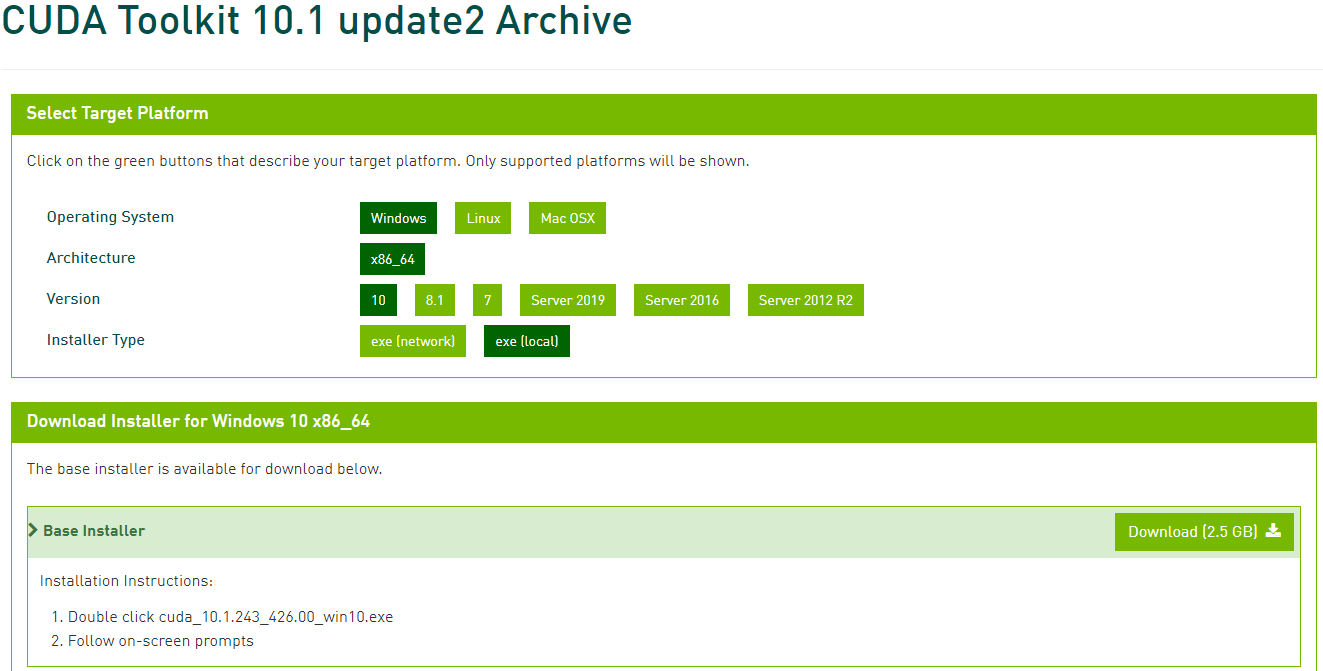
- cuDNN

3. Anaconda Update
- Anaconda에 기본적으로 설치된 Package를 최신으로 Update합니다.
conda update conda
conda update anaconda
conda update python
conda update –all
-
이제, 가상환경을 하나 만듭니다. 이름은 원하는대로 지으면 됩니다.
( 저는 TF.2.3.0-GPU 라고 짓겠습니다. )
conda create –name TF.2.3.0-GPU
4. Visual Studio Build Tool & Redistributable Download & 설치
-
이번에는 Visual Studio Build Tool & Redistributable을 설치해 보도록 하겠습니다.
-
TF 2.3에는 Visual Studio 2019용 Build Tools & Visual Studio 2019용 Microsoft Visual C++ 재배포 가능 패키지가 필요합니다.
-
아래 Link에서 Download할 수 있습니다.
Visual Studio 2019용 Build Tools
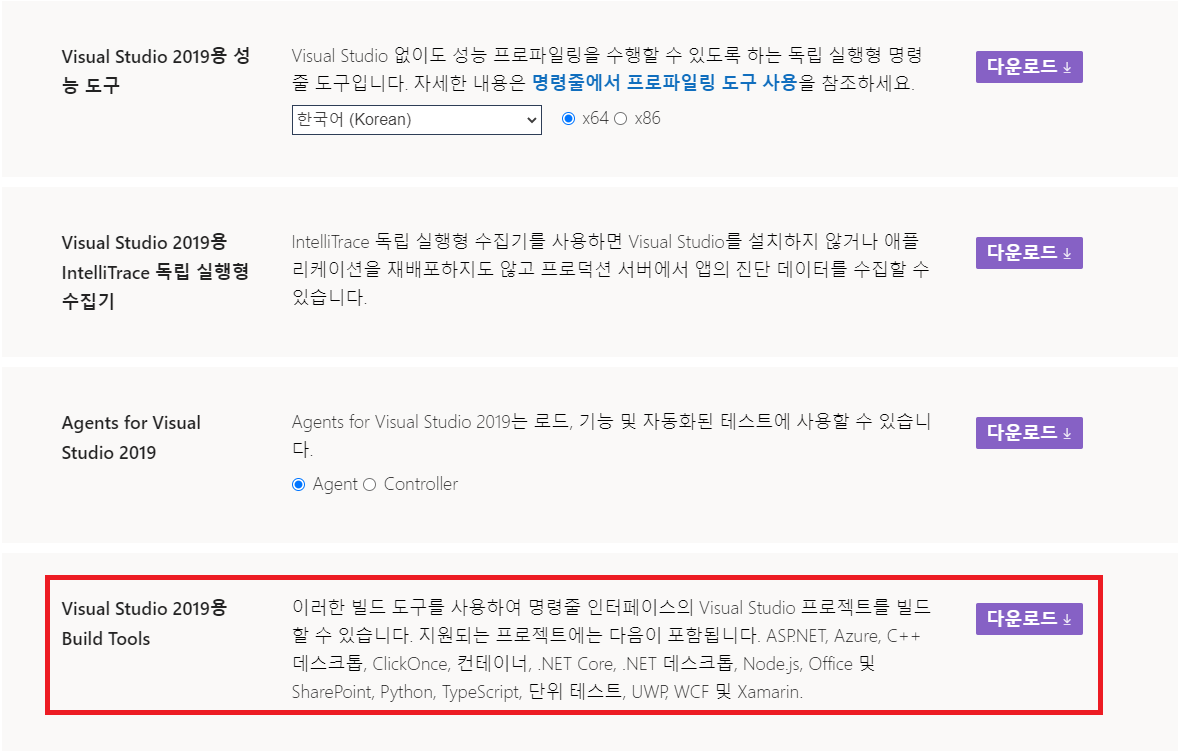
Visual Studio 2019용 Microsoft Visual C++ 재배포 가능 패키지
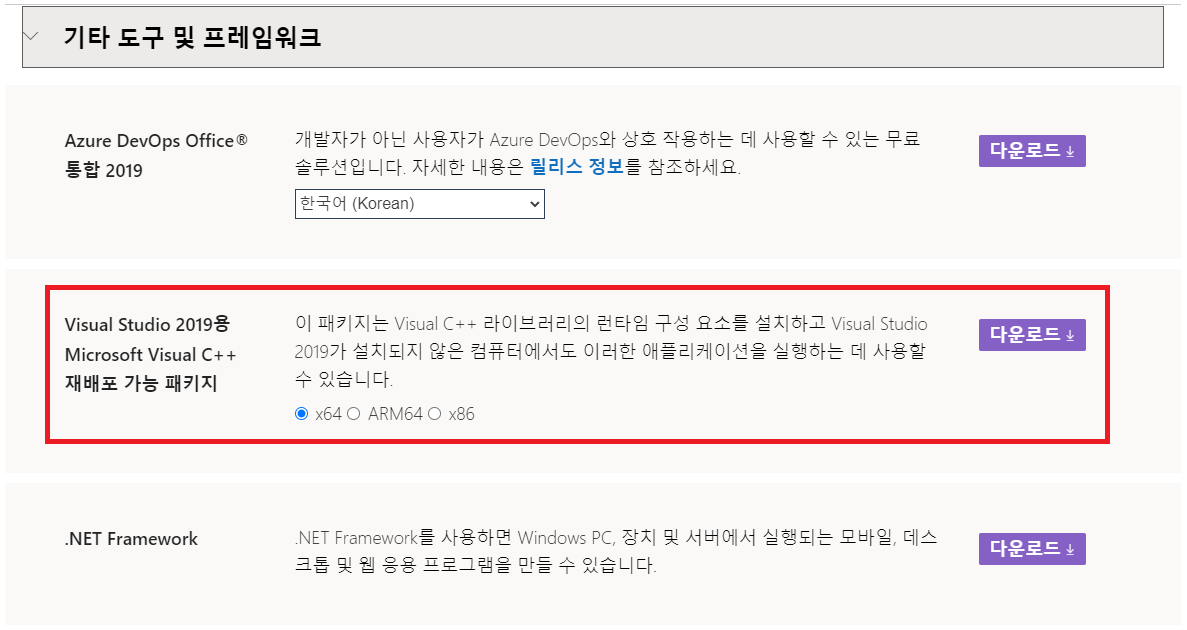
- Download받은 Visual Studio Build Tool & Redistributable를 차례로 설치합니다.
5. CUDA & cuDNN 설치
-
이제 아까 Download받은 CUDA Toolkit을 설치합니다.
-
시키는 대로 쭉쭉 진행하면 됩니다.
-
cuDNN은 특별히 설치하는 방법이 있는 것이 아니라, 압축을 푼 후에 3개의 Folder에 있는 File을 CUDA Toolkit이 설치된 위치에 동일 Folder Name에 Copy하면 됩니다.
6. Tensorflow 설치
-
이제 거의 다 되었습니다.
-
아까 만든 TF 2.3 가상환경을 Activate 시킵니다.
conda activate TF.2.3.0-GPU
- ipython kernel 설치합니다.
conda install ipykernel jupyter
python -m ipykernel install –user –name TF.2.3.0-GPU –display-name “TF.2.3.0-GPU”
-
이제 Tensorflow만 설치하면 되는데, Tensorflow와 Python Version이 맞지 않으면 Tensorflow가 설치되지 않습니다.
-
이럴 경우에는 Python Version을 맞춰줘야 합니다.
conda install python=x.x.x
- Tensorflow를 설치합니다.
pip install tensorflow==2.3
- 한참 걸린 후에 완료가 되면, 재부팅 한 번 해줍니다.
7. 확인
- 아래 Code를 실행해 봅니다.
import tensorflow as tf

tf.__version__
'2.3.0'
from tensorflow.python.client import device_lib

print(device_lib.list_local_devices())
[name: "/device:CPU:0"
device_type: "CPU"
memory_limit: 268435456
locality {
}
incarnation: 1980815847893330967
, name: "/device:XLA_CPU:0"
device_type: "XLA_CPU"
memory_limit: 17179869184
locality {
}
incarnation: 3022208443520489181
physical_device_desc: "device: XLA_CPU device"
, name: "/device:GPU:0"
device_type: "GPU"
memory_limit: 5060693856
locality {
  bus_id: 1
  links {
  }
}
incarnation: 17026303584874205879
physical_device_desc: "device: 0, name: GeForce GTX 1060 6GB, pci bus id: 0000:01:00.0, compute capability: 6.1"
, name: "/device:XLA_GPU:0"
device_type: "XLA_GPU"
memory_limit: 17179869184
locality {
}
incarnation: 11299119644739967365
physical_device_desc: "device: XLA_GPU device"
]
tf.test.is_gpu_available(
    cuda_only=False,
    min_cuda_compute_capability=None
)
True
tf.config.list_physical_devices('GPU')
[PhysicalDevice(name='/physical_device:GPU:0', device_type='GPU')]
- 잘 되는것 같네요.
Appendix
- Tensorflow 2.3에서는 scipy 1.4.1이 잘 동작하더라구요.