BERT Text Classification
BERT Text Classification
- 이번 Post에서는 BERT Model을 이용하여, Text 분류 작업을 해보도록 하겠습니다.
- 영화 감상평이 긍정적인지 부정적인지 분류해 놓은 Data Set을 이용할 예정입니다.
- 실제로 사용할 Data Set은 Large Movie Review Dataset 입니다.
0. About BERT
- BERT 및 기타 Transformer Encoder Architecture는 Natural Language Process의 다양한 분야에서 좋은 성능을 보여주고 있습니다.
- BERT or Transformer Encoder는 Natural Language Process의 다양한 분야에 사용할 수 있는 Vector Space를 계산해 줍니다.
- BERT(Bidirectional Encoder Representations from Transformers)는 이름에서 유추할 수 있듯이, Transformer Encoder를 사용하여 전체 Text의 각 Toekn의 앞/뒤 Token을 고려하여 Token을 처리하는 구조를 가지고 있습니다.
- BERT는 large text corpus에서 Train한 후에, 특정 Task에 적합하도록 Fine Tuning을 합니다.
-
BERT의 Paper는 아래 Link를 참고하시면 됩니다.
BERT(Bidirectional Encoder Representations from Transformers)
1. Load Package
- Tensorflow를 사용할 예정이며, GPU가 제대로 동작하는지도 한 번 확인해 보았습니다.
import os
import shutil

import tensorflow as tf
import tensorflow_hub as hub
import tensorflow_text as text

import matplotlib.pyplot as plt
import tensorflow_addons as tfa

tf.get_logger().setLevel('ERROR')
tf.__version__
'2.5.0'
tf.config.list_physical_devices('GPU')
[PhysicalDevice(name='/physical_device:GPU:0', device_type='GPU')]
2. Download the IMDB dataset
- 이번 Post에서 사용할 IMDB Dataset에 대해서 알아보겠습니다.
- IMDB Dataset에 대해서는 들어보신 분이 많을 것입니다. 영화 Review Site에서 영화에 대한 긍정/부정 의견을 모아서 만든 Dataset입니다.
- 아래 Code로 Download할 수 있습니다.
url = 'https://ai.stanford.edu/~amaas/data/sentiment/aclImdb_v1.tar.gz'

dataset = tf.keras.utils.get_file('aclImdb_v1.tar.gz', url,
                                  untar=True, cache_dir='.',
                                  cache_subdir='')

dataset_dir = os.path.join(os.path.dirname(dataset), 'aclImdb')

train_dir = os.path.join(dataset_dir, 'train')

# remove unused folders to make it easier to load the data
remove_dir = os.path.join(train_dir, 'unsup')
shutil.rmtree(remove_dir)
- Dataset을 받으면 자동으로 Unzip을 해줍니다.
- ‘aclImdb’라는 Folder가 생기고 그 아래에 다음과 같은 구조로 Folder가 구성되어 있습니다.
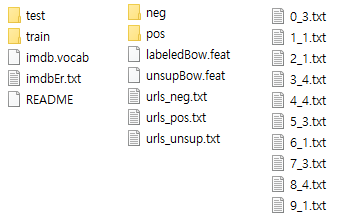
- 친절하게도 Train / Test Data가 분리되어 있네요.
- Folder 구조가 Train / Test으로 이미 나누어져 있고, 게다가 긍정/부정도 Folder로 나누어져 있습니다.
- 이런 상황에서 사용하기 좋은 함수가 text_dataset_from_directory()입니다.
- text_dataset_from_directory()에 대한 자세한 사항은 아래 Link에서 확인하도록 합니다. https://www.tensorflow.org/api_docs/python/tf/keras/preprocessing/text_dataset_from_directory
- Test Data은 이미 있으니, Train Data를 이용하여 Validation Data를 만들도록 합니다.
- Dataset을 만들어 봅시다.
AUTOTUNE = tf.data.AUTOTUNE

# Batch Size는 개별 상황에 맞게 적절하게 바꿔주세요
#batch_size = 32
batch_size = 4

seed = 42
- 먼저 Train Folder에 있는 Data로 Train Dataset / Validation Dataset 나눕니다.
- ‘validation_split’ 과 ‘subset’을 이용해서 나눌 수 있는데, ‘subset’은 “training” or “validation”을 가질 수 있고, ‘validation_split’이 설정된 경우에 기능을 합니다.
- 먼저 Train Dataset을 만듭니다.
raw_train_ds = tf.keras.preprocessing.text_dataset_from_directory(
    'aclImdb/train',
    batch_size=batch_size,
    validation_split=0.2,
    subset='training',
    seed=seed)

class_names = raw_train_ds.class_names
train_ds = raw_train_ds.cache().prefetch(buffer_size=AUTOTUNE)
Found 25000 files belonging to 2 classes.
Using 20000 files for training.
- 그리고, Validation Dataset을 만듭니다.
val_ds = tf.keras.preprocessing.text_dataset_from_directory(
    'aclImdb/train',
    batch_size=batch_size,
    validation_split=0.2,
    subset='validation',
    seed=seed)

val_ds = val_ds.cache().prefetch(buffer_size=AUTOTUNE)
Found 25000 files belonging to 2 classes.
Using 5000 files for validation.
- 마지막으로, Test Dataset을 만듭니다.
test_ds = tf.keras.preprocessing.text_dataset_from_directory(
    'aclImdb/test',
    batch_size=batch_size)

test_ds = test_ds.cache().prefetch(buffer_size=AUTOTUNE)
Found 25000 files belonging to 2 classes.
type(class_names)
list
class_names
['neg', 'pos']
- Data가 잘 만들어 졌는지 한 번 살펴보겠습니다.
for text_batch, label_batch in train_ds.take(1):
    for i in range(3):
        print(f'Review: {text_batch.numpy()[i]}')
        label = label_batch.numpy()[i]
        print(f'Label : {label} ({class_names[label]})')
Review: b'Mr Perlman gives a standout performance (as usual). Sadly, he has to struggle with an underwritten script and some nonsensical set pieces.<br /><br />Larsen is in "Die Hard" mode complete with singlet and bulging muscles, I\'m sure he could do better but seems satisfied to grimace and snarl through his part.<br /><br />The lovely Erika is very decorative (even though fully clothed!) and shows some signs of "getting" acting at last.<br /><br />SFX are mainly poor CGI and steals from other movies.<br /><br />The shootouts are pitiful - worthy of the A-Team<br /><br />Not even worth seeing for Perlman - AVOID'
Label : 0 (neg)
Review: b"During the whole Pirates of The Caribbean Trilogy Craze Paramount Pictures really dropped the ball in restoring this Anthony Quinn directed Cecil B. DeMille supervised movie and getting it on DVD and Blu Ray with all the extras included. It is obvious to me that Paramount Pictures Execs are blind as bats and ignorant of the fact that they have a really good pirate movie in their vault about a real pirate who actually lived in New Orleans, Louisiana which would have helped make The Crescent City once again famous for it's Pirate Connections. When the Execs at Paramount finally get with the program and release this movie in digital format then I will be a happy camper. Paramount Pictures it is up to you to get off your duff and get this film restored now !"
Label : 1 (pos)
Review: b"1st watched 12/7/2002 - 3 out of 10(Dir-Steve Purcell): Typical Mary Kate & Ashley fare with a few more kisses. It looks to me like the girls are getting pretty tired of this stuff and it will be interesting what happens to them if they ever decide to split up and go there own ways. In this episode of their adventures they are interns in Rome for a `fashion' designer who puts them right into the mailroom to learn what working hard is all about(I guess..). Besides the typical flirtations with boys there is nothing much else except the Rome scenario until about \xc2\xbe way into the movie when it's finally revealed why they are getting fired, then re-hired, then fired again, then re-hired again. This is definetly made by people who don't understand the corporate world and it shows in their interpretation of it. Maybe the real world will be their next adventure(if there is one.). Even my kids didn't seem to care for this boring `adventure' in the make-believe. Let's see they probably only have a couple of years till their legal adults. We'll see what happens then."
Label : 0 (neg)
- 위와 같이 시청자가 작성한 Review와 함께 그 Review가 긍정적인지 부정적인지 나타내는 Label이 있습니다.
3. Select BERT Model
- BERT는 목적에 맞게 다양한 규모의 Model이 준비되어 있습니다.
-
아래 Link에서 종류를 확인할 수 있습니다.
https://tfhub.dev/google/collections/bert/1
- 또한, 각 Model에 Input Shape에 맞게 Text를 Preprocessing해 주는 Function도 함께 준비되어 있습니다.
- 시작은 Small BERT Model로 해 보겠습니다.
- 적당한 크기의 small_bert/bert_en_uncased_L-4_H-512_A-8로 정해보도록 하죠
- 아래 Code는 우리가 정한 Model에 대한 위치와 해당 Preprocessor를 Mapping해 줍니다.
bert_model_name = 'small_bert/bert_en_uncased_L-4_H-512_A-8'

map_name_to_handle = {
    'bert_en_uncased_L-12_H-768_A-12':
        'https://tfhub.dev/tensorflow/bert_en_uncased_L-12_H-768_A-12/3',
    'bert_en_cased_L-12_H-768_A-12':
        'https://tfhub.dev/tensorflow/bert_en_cased_L-12_H-768_A-12/3',
    'bert_multi_cased_L-12_H-768_A-12':
        'https://tfhub.dev/tensorflow/bert_multi_cased_L-12_H-768_A-12/3',
    'small_bert/bert_en_uncased_L-2_H-128_A-2':
        'https://tfhub.dev/tensorflow/small_bert/bert_en_uncased_L-2_H-128_A-2/1',
    'small_bert/bert_en_uncased_L-2_H-256_A-4':
        'https://tfhub.dev/tensorflow/small_bert/bert_en_uncased_L-2_H-256_A-4/1',
    'small_bert/bert_en_uncased_L-2_H-512_A-8':
        'https://tfhub.dev/tensorflow/small_bert/bert_en_uncased_L-2_H-512_A-8/1',
    'small_bert/bert_en_uncased_L-2_H-768_A-12':
        'https://tfhub.dev/tensorflow/small_bert/bert_en_uncased_L-2_H-768_A-12/1',
    'small_bert/bert_en_uncased_L-4_H-128_A-2':
        'https://tfhub.dev/tensorflow/small_bert/bert_en_uncased_L-4_H-128_A-2/1',
    'small_bert/bert_en_uncased_L-4_H-256_A-4':
        'https://tfhub.dev/tensorflow/small_bert/bert_en_uncased_L-4_H-256_A-4/1',
    'small_bert/bert_en_uncased_L-4_H-512_A-8':
        'https://tfhub.dev/tensorflow/small_bert/bert_en_uncased_L-4_H-512_A-8/1',
    'small_bert/bert_en_uncased_L-4_H-768_A-12':
        'https://tfhub.dev/tensorflow/small_bert/bert_en_uncased_L-4_H-768_A-12/1',
    'small_bert/bert_en_uncased_L-6_H-128_A-2':
        'https://tfhub.dev/tensorflow/small_bert/bert_en_uncased_L-6_H-128_A-2/1',
    'small_bert/bert_en_uncased_L-6_H-256_A-4':
        'https://tfhub.dev/tensorflow/small_bert/bert_en_uncased_L-6_H-256_A-4/1',
    'small_bert/bert_en_uncased_L-6_H-512_A-8':
        'https://tfhub.dev/tensorflow/small_bert/bert_en_uncased_L-6_H-512_A-8/1',
    'small_bert/bert_en_uncased_L-6_H-768_A-12':
        'https://tfhub.dev/tensorflow/small_bert/bert_en_uncased_L-6_H-768_A-12/1',
    'small_bert/bert_en_uncased_L-8_H-128_A-2':
        'https://tfhub.dev/tensorflow/small_bert/bert_en_uncased_L-8_H-128_A-2/1',
    'small_bert/bert_en_uncased_L-8_H-256_A-4':
        'https://tfhub.dev/tensorflow/small_bert/bert_en_uncased_L-8_H-256_A-4/1',
    'small_bert/bert_en_uncased_L-8_H-512_A-8':
        'https://tfhub.dev/tensorflow/small_bert/bert_en_uncased_L-8_H-512_A-8/1',
    'small_bert/bert_en_uncased_L-8_H-768_A-12':
        'https://tfhub.dev/tensorflow/small_bert/bert_en_uncased_L-8_H-768_A-12/1',
    'small_bert/bert_en_uncased_L-10_H-128_A-2':
        'https://tfhub.dev/tensorflow/small_bert/bert_en_uncased_L-10_H-128_A-2/1',
    'small_bert/bert_en_uncased_L-10_H-256_A-4':
        'https://tfhub.dev/tensorflow/small_bert/bert_en_uncased_L-10_H-256_A-4/1',
    'small_bert/bert_en_uncased_L-10_H-512_A-8':
        'https://tfhub.dev/tensorflow/small_bert/bert_en_uncased_L-10_H-512_A-8/1',
    'small_bert/bert_en_uncased_L-10_H-768_A-12':
        'https://tfhub.dev/tensorflow/small_bert/bert_en_uncased_L-10_H-768_A-12/1',
    'small_bert/bert_en_uncased_L-12_H-128_A-2':
        'https://tfhub.dev/tensorflow/small_bert/bert_en_uncased_L-12_H-128_A-2/1',
    'small_bert/bert_en_uncased_L-12_H-256_A-4':
        'https://tfhub.dev/tensorflow/small_bert/bert_en_uncased_L-12_H-256_A-4/1',
    'small_bert/bert_en_uncased_L-12_H-512_A-8':
        'https://tfhub.dev/tensorflow/small_bert/bert_en_uncased_L-12_H-512_A-8/1',
    'small_bert/bert_en_uncased_L-12_H-768_A-12':
        'https://tfhub.dev/tensorflow/small_bert/bert_en_uncased_L-12_H-768_A-12/1',
    'albert_en_base':
        'https://tfhub.dev/tensorflow/albert_en_base/2',
    'electra_small':
        'https://tfhub.dev/google/electra_small/2',
    'electra_base':
        'https://tfhub.dev/google/electra_base/2',
    'experts_pubmed':
        'https://tfhub.dev/google/experts/bert/pubmed/2',
    'experts_wiki_books':
        'https://tfhub.dev/google/experts/bert/wiki_books/2',
    'talking-heads_base':
        'https://tfhub.dev/tensorflow/talkheads_ggelu_bert_en_base/1',
}

map_model_to_preprocess = {
    'bert_en_uncased_L-12_H-768_A-12':
        'https://tfhub.dev/tensorflow/bert_en_uncased_preprocess/3',
    'bert_en_cased_L-12_H-768_A-12':
        'https://tfhub.dev/tensorflow/bert_en_cased_preprocess/3',
    'small_bert/bert_en_uncased_L-2_H-128_A-2':
        'https://tfhub.dev/tensorflow/bert_en_uncased_preprocess/3',
    'small_bert/bert_en_uncased_L-2_H-256_A-4':
        'https://tfhub.dev/tensorflow/bert_en_uncased_preprocess/3',
    'small_bert/bert_en_uncased_L-2_H-512_A-8':
        'https://tfhub.dev/tensorflow/bert_en_uncased_preprocess/3',
    'small_bert/bert_en_uncased_L-2_H-768_A-12':
        'https://tfhub.dev/tensorflow/bert_en_uncased_preprocess/3',
    'small_bert/bert_en_uncased_L-4_H-128_A-2':
        'https://tfhub.dev/tensorflow/bert_en_uncased_preprocess/3',
    'small_bert/bert_en_uncased_L-4_H-256_A-4':
        'https://tfhub.dev/tensorflow/bert_en_uncased_preprocess/3',
    'small_bert/bert_en_uncased_L-4_H-512_A-8':
        'https://tfhub.dev/tensorflow/bert_en_uncased_preprocess/3',
    'small_bert/bert_en_uncased_L-4_H-768_A-12':
        'https://tfhub.dev/tensorflow/bert_en_uncased_preprocess/3',
    'small_bert/bert_en_uncased_L-6_H-128_A-2':
        'https://tfhub.dev/tensorflow/bert_en_uncased_preprocess/3',
    'small_bert/bert_en_uncased_L-6_H-256_A-4':
        'https://tfhub.dev/tensorflow/bert_en_uncased_preprocess/3',
    'small_bert/bert_en_uncased_L-6_H-512_A-8':
        'https://tfhub.dev/tensorflow/bert_en_uncased_preprocess/3',
    'small_bert/bert_en_uncased_L-6_H-768_A-12':
        'https://tfhub.dev/tensorflow/bert_en_uncased_preprocess/3',
    'small_bert/bert_en_uncased_L-8_H-128_A-2':
        'https://tfhub.dev/tensorflow/bert_en_uncased_preprocess/3',
    'small_bert/bert_en_uncased_L-8_H-256_A-4':
        'https://tfhub.dev/tensorflow/bert_en_uncased_preprocess/3',
    'small_bert/bert_en_uncased_L-8_H-512_A-8':
        'https://tfhub.dev/tensorflow/bert_en_uncased_preprocess/3',
    'small_bert/bert_en_uncased_L-8_H-768_A-12':
        'https://tfhub.dev/tensorflow/bert_en_uncased_preprocess/3',
    'small_bert/bert_en_uncased_L-10_H-128_A-2':
        'https://tfhub.dev/tensorflow/bert_en_uncased_preprocess/3',
    'small_bert/bert_en_uncased_L-10_H-256_A-4':
        'https://tfhub.dev/tensorflow/bert_en_uncased_preprocess/3',
    'small_bert/bert_en_uncased_L-10_H-512_A-8':
        'https://tfhub.dev/tensorflow/bert_en_uncased_preprocess/3',
    'small_bert/bert_en_uncased_L-10_H-768_A-12':
        'https://tfhub.dev/tensorflow/bert_en_uncased_preprocess/3',
    'small_bert/bert_en_uncased_L-12_H-128_A-2':
        'https://tfhub.dev/tensorflow/bert_en_uncased_preprocess/3',
    'small_bert/bert_en_uncased_L-12_H-256_A-4':
        'https://tfhub.dev/tensorflow/bert_en_uncased_preprocess/3',
    'small_bert/bert_en_uncased_L-12_H-512_A-8':
        'https://tfhub.dev/tensorflow/bert_en_uncased_preprocess/3',
    'small_bert/bert_en_uncased_L-12_H-768_A-12':
        'https://tfhub.dev/tensorflow/bert_en_uncased_preprocess/3',
    'bert_multi_cased_L-12_H-768_A-12':
        'https://tfhub.dev/tensorflow/bert_multi_cased_preprocess/3',
    'albert_en_base':
        'https://tfhub.dev/tensorflow/albert_en_preprocess/3',
    'electra_small':
        'https://tfhub.dev/tensorflow/bert_en_uncased_preprocess/3',
    'electra_base':
        'https://tfhub.dev/tensorflow/bert_en_uncased_preprocess/3',
    'experts_pubmed':
        'https://tfhub.dev/tensorflow/bert_en_uncased_preprocess/3',
    'experts_wiki_books':
        'https://tfhub.dev/tensorflow/bert_en_uncased_preprocess/3',
    'talking-heads_base':
        'https://tfhub.dev/tensorflow/bert_en_uncased_preprocess/3',
}

tfhub_handle_encoder = map_name_to_handle[bert_model_name]
tfhub_handle_preprocess = map_model_to_preprocess[bert_model_name]

print(f'BERT model selected           : {tfhub_handle_encoder}')
print(f'Preprocess model auto-selected: {tfhub_handle_preprocess}')
BERT model selected           : https://tfhub.dev/tensorflow/small_bert/bert_en_uncased_L-4_H-512_A-8/1
Preprocess model auto-selected: https://tfhub.dev/tensorflow/bert_en_uncased_preprocess/3
- Preprocessor를 Layer 형태로 변환해서 나중에 사용할 수 있도록 준비합니다.
bert_preprocess_model = hub.KerasLayer(tfhub_handle_preprocess)
- 간단하게 Test해 보겠습니다.
- 아무 문장이나 Preprocessing을 거쳐서 BERT에 넣어서 출력이 제대로 되는지 확인해 보겠습니다.
- this is such an amazing movie! 라는 간단한 문장으로 Test해 보죠
text_test = ['this is such an amazing movie!']
text_preprocessed = bert_preprocess_model(text_test)

print(f'Keys       : {list(text_preprocessed.keys())}')
print(f'Shape      : {text_preprocessed["input_word_ids"].shape}')
print(f'Word Ids   : {text_preprocessed["input_word_ids"][0, :12]}')
print(f'Input Mask : {text_preprocessed["input_mask"][0, :12]}')
print(f'Type Ids   : {text_preprocessed["input_type_ids"][0, :12]}')
Keys       : ['input_type_ids', 'input_mask', 'input_word_ids']
Shape      : (1, 128)
Word Ids   : [ 101 2023 2003 2107 2019 6429 3185  999  102    0    0    0]
Input Mask : [1 1 1 1 1 1 1 1 1 0 0 0]
Type Ids   : [0 0 0 0 0 0 0 0 0 0 0 0]
- BERT Model은 Input으로 3개의 값이 필요합니다.
- BERT Model Paper를 보시면, ‘Token embeddings’ , ‘Sentence Embeddings’, ‘Transformer positional embeddings’ 이라는 용어가 나옵니다.
- ‘Token embeddings’은 각 Token(단어)의 Vocabulary Embedding ID입니다.
- ‘Sentence Embeddings’은 하나의 문장에서 같은 값을 가집니다. 위의 예제에서는 한 문장만 입력이 되었으므로, 1이 나오고 나머지는 모두 0이 되어 있는 것을 확인할 수 있습니다. 만약 여러개의 문장이라면 다른 숫자가 나오겠죠.
- 위의 각 항목에 해당하는 값들이 ‘input_word_ids’ , ‘input_mask’ , ‘input_type_ids’ 가 됩니다.
- 같은 이름으로 하면 좋을텐데, 왜 이름을 다르게 붙였는지…
- Preprocessor를 거친 값들은 비로소 BERT에 입력으로 사용할 수 있습니다.
- BERT Model도 Download해서 Layer로 변환합니다.
bert_model = hub.KerasLayer(tfhub_handle_encoder)
- 좀 전에 Preprocessing된 Text를 BERT Model에 넣어서 결과를 보도록 하겠습니다.
bert_results = bert_model(text_preprocessed)

print(f'Loaded BERT: {tfhub_handle_encoder}')
print(f'Pooled Outputs Shape:{bert_results["pooled_output"].shape}')
print(f'Pooled Outputs Values:{bert_results["pooled_output"][0, :12]}')
print(f'Sequence Outputs Shape:{bert_results["sequence_output"].shape}')
print(f'Sequence Outputs Values:{bert_results["sequence_output"][0, :12]}')
Loaded BERT: https://tfhub.dev/tensorflow/small_bert/bert_en_uncased_L-4_H-512_A-8/1
Pooled Outputs Shape:(1, 512)
Pooled Outputs Values:[ 0.76262873  0.99280983 -0.18611865  0.3667382   0.15233754  0.6550446
  0.9681154  -0.948627    0.00216129 -0.9877731   0.06842719 -0.9763059 ]
Sequence Outputs Shape:(1, 128, 512)
Sequence Outputs Values:[[-0.2894631   0.3432125   0.33231503 ...  0.21300879  0.71020824
  -0.05771083]
 [-0.28741956  0.31981033 -0.23018478 ...  0.58455044 -0.21329702
   0.72692096]
 [-0.66156983  0.68876874 -0.87432986 ...  0.10877332 -0.26173213
   0.4785546 ]
 ...
 [-0.22561109 -0.2892557  -0.07064363 ...  0.47566098  0.8327722
   0.40025353]
 [-0.29824188 -0.27473086 -0.05450502 ...  0.48849785  1.0955354
   0.18163365]
 [-0.4437817   0.00930776  0.07223777 ...  0.17290121  1.1833248
   0.07898013]]
- BERT가 출력하는 값을 보시면, Pooled Outputs과 Sequence Outputs이 있습니다.
- 우리가 사용할 값은 ‘Pooled Outputs’이며, 이 값을 이용해 Classify하도록 하겠습니다.
4. Build Model
- 이제 필요한 모든 준비를 마쳤으니, 실제 Model을 만들어 보겠습니다.
4.1. Define Model
def build_classifier_model():
    text_input = tf.keras.layers.Input(shape=(), dtype=tf.string, name='text')
    preprocessing_layer = hub.KerasLayer(tfhub_handle_preprocess, name='preprocessing')
    encoder_inputs = preprocessing_layer(text_input)
    encoder = hub.KerasLayer(tfhub_handle_encoder, trainable=True, name='BERT_encoder')
    outputs = encoder(encoder_inputs)
    net = outputs['pooled_output']
    net = tf.keras.layers.Dropout(0.1)(net)
    net = tf.keras.layers.Dense(1, activation=None, name='classifier')(net)

    return tf.keras.Model(text_input, net)
- text_input = tf.keras.layers.Input(shape=(), dtype=tf.string, name=’text’)
- 영화 Review Text를 받는 Input Layer입니다.
- preprocessing_layer = hub.KerasLayer(tfhub_handle_preprocess, name=’preprocessing’)
- 우리가 선택한 BERT Model에 해당하는 Preprocessor를 Download해서 Layer 형태로 만듭니다.
- encoder_inputs = preprocessing_layer(text_input)
- Preprocessor를 거친 Text를 BERT Input형태로 만듭니다.
- encoder = hub.KerasLayer(tfhub_handle_encoder, trainable=True, name=’BERT_encoder’)
- BERT Layer입니다.
- outputs = encoder(encoder_inputs)
- Output은 BERT Layer에 encoder_inputs을 넣은 결과값입니다.
- net = outputs[‘pooled_output’]
- 이제 BERT의 출력값에서 실제가 우리가 사용할 값은 ‘pooled_output’ 값입니다.
- net = tf.keras.layers.Dropout(0.1)(net)
- net = tf.keras.layers.Dense(1, activation=None, name=’classifier’)(net)
- 특별한 Dense Layer없이 바로 출력을 뽑아내네요.
- Binary Classification이기 때문에 출력은 한개입니다.
- 만든 Model이 제대로 값이 출력하는지 한 번 볼까요?
- 이전에 Test 문장을 입력으로 넣어보겠습니다. 물론, 이 Model은 Train이 되어 있지 않기 때문에 출력값은 아무런 의미가 없습니다.
- 단지, 동작이 되는지만 보는것입니다.
classifier_model = build_classifier_model()
bert_raw_result = classifier_model(tf.constant(text_test))
print(tf.sigmoid(bert_raw_result))
tf.Tensor([[0.66958743]], shape=(1, 1), dtype=float32)
- 값 하나가 출력되네요. 저 값은 확률값이겠죠?
4.2. Evaluation Metric
- Evaluation은 Binary Classification에 맞게 선택합니다.
loss = tf.keras.losses.BinaryCrossentropy(from_logits=True)
metrics = tf.metrics.BinaryAccuracy()
4.3. Optimizer
- Optimizer는 Adam을 사용하도록 하겠습니다.
init_lr = 3e-5

step = tf.Variable(0, trainable=False)
schedule = tf.optimizers.schedules.PiecewiseConstantDecay(
        [1407*20, 1407*30], [1e-3, 1e-4, 1e-5])
wd = lambda: 1e-1 * schedule(step)

optimizer = tfa.optimizers.AdamW(learning_rate=init_lr, weight_decay=wd)
epochs = 5
classifier_model.compile(optimizer=optimizer,
                         loss=loss,
                         metrics=metrics)
5. Training Model
- 모든 준비를 마쳤으니, Train을 시작해 보겠습니다.
- 저는 GTX 960에서 Train했는데, 1 Epoch에 11분 정도 걸렸습니다.
print(f'Training model with {tfhub_handle_encoder}')

history = classifier_model.fit(x=train_ds,
                               validation_data=val_ds,
                               epochs=epochs)
Training model with https://tfhub.dev/tensorflow/small_bert/bert_en_uncased_L-4_H-512_A-8/1
Epoch 1/5
5000/5000 [==============================] - 675s 134ms/step - loss: 0.4439 - binary_accuracy: 0.7833 - val_loss: 0.4130 - val_binary_accuracy: 0.7922
Epoch 2/5
5000/5000 [==============================] - 665s 133ms/step - loss: 0.3583 - binary_accuracy: 0.8393 - val_loss: 0.3925 - val_binary_accuracy: 0.8202
Epoch 3/5
5000/5000 [==============================] - 669s 134ms/step - loss: 0.2691 - binary_accuracy: 0.8934 - val_loss: 0.4323 - val_binary_accuracy: 0.8196
Epoch 4/5
5000/5000 [==============================] - 672s 134ms/step - loss: 0.2085 - binary_accuracy: 0.9220 - val_loss: 0.5172 - val_binary_accuracy: 0.8052
Epoch 5/5
5000/5000 [==============================] - 749s 150ms/step - loss: 0.1722 - binary_accuracy: 0.9399 - val_loss: 0.5505 - val_binary_accuracy: 0.7980
- Train Data에서 Accuracy는 계속 올라가지만, 2번째 Epoch에서 Validation Accuracy는 떨어지네요.
- Overfitting입니다.
history_dict = history.history
print(history_dict.keys())

acc = history_dict['binary_accuracy']
val_acc = history_dict['val_binary_accuracy']
loss = history_dict['loss']
val_loss = history_dict['val_loss']

epochs = range(1, len(acc) + 1)
fig = plt.figure(figsize=(10, 6))
fig.tight_layout()

plt.subplot(2, 1, 1)
# "bo" is for "blue dot"
plt.plot(epochs, loss, 'r', label='Training loss')
# b is for "solid blue line"
plt.plot(epochs, val_loss, 'b', label='Validation loss')
plt.title('Training and validation loss')
# plt.xlabel('Epochs')
plt.ylabel('Loss')
plt.legend()

plt.subplot(2, 1, 2)
plt.plot(epochs, acc, 'r', label='Training acc')
plt.plot(epochs, val_acc, 'b', label='Validation acc')
plt.title('Training and validation accuracy')
plt.xlabel('Epochs')
plt.ylabel('Accuracy')
plt.legend(loc='lower right')
dict_keys(['loss', 'binary_accuracy', 'val_loss', 'val_binary_accuracy'])

6. Evaluation
- Test Data로 평가를 한 번 해보죠.
loss, accuracy = classifier_model.evaluate(test_ds)

print(f'Loss: {loss}')
print(f'Accuracy: {accuracy}')
6250/6250 [==============================] - 291s 46ms/step - loss: 0.6742 - binary_accuracy: 0.7563
Loss: 0.6742448210716248
Accuracy: 0.7562800049781799
- Val. Accuracy와 비슷한 결과가 나오네요.
- Model을 저장하고 다시 불러와서 Test하는 방법입니다.
- .save()를 사용하시면 됩니다.
dataset_name = 'imdb'
saved_model_path = './{}_bert'.format(dataset_name.replace('/', '_'))

classifier_model.save(saved_model_path, include_optimizer=False)
- 다시 불러올때는 tf.saved_model.load()를 사용하시면 됩니다.
reloaded_model = tf.saved_model.load(saved_model_path)
- 원래 모델이랑 Load한 모델이랑 결과가 똑같죠?
def print_my_examples(inputs, results):
    result_for_printing = \
    [f'input: {inputs[i]:<30} : score: {results[i][0]:.6f}'
                         for i in range(len(inputs))]
    print(*result_for_printing, sep='\n')
    print()


examples = [
    'this is such an amazing movie!',  # this is the same sentence tried earlier
    'The movie was great!',
    'The movie was meh.',
    'The movie was okish.',
    'The movie was terrible...'
]

reloaded_results = tf.sigmoid(reloaded_model(tf.constant(examples)))
original_results = tf.sigmoid(classifier_model(tf.constant(examples)))

print('Results from the saved model:')
print_my_examples(examples, reloaded_results)
print('Results from the model in memory:')
print_my_examples(examples, original_results)
Results from the saved model:
input: this is such an amazing movie! : score: 0.983353
input: The movie was great!           : score: 0.983342
input: The movie was meh.             : score: 0.824279
input: The movie was okish.           : score: 0.137596
input: The movie was terrible...      : score: 0.018345

Results from the model in memory:
input: this is such an amazing movie! : score: 0.983353
input: The movie was great!           : score: 0.983342
input: The movie was meh.             : score: 0.824279
input: The movie was okish.           : score: 0.137596
input: The movie was terrible...      : score: 0.018345
- 이번 Post에서는 간단하게 BERT를 사용하는 방법에 대해서 알아보았습니다.
- 다음에는 BERT를 이용한 다른 Example을 알아보도록 하겠습니다.